Showing posts with label DIY. Show all posts

Monday, July 4, 2011

Lemon Blueberry Cake and Flower Arrangements!

Happy Independence Day Everyone!

The 4th of July has long been my favorite holiday because it's in the summer, there's another excuse to BBQ plus the added fun of fireworks!  Unfortunately, this year I don't have any grand plans (mostly due to the case of strep throat I caught of Saturday, boo) however my mom held a Quilter's Guild picnic last Monday where I was able to try out a recipe I've been dying to make and create some beautiful flower arrangements for the tables!

As I was browsing On Demand I found a Lemon Blueberry Cake recipe by Martha Stewart which I had to try.  The recipe was pretty straight forward and easy to make! You can get the recipe HERE!
 First you cream the sugar and butter together then add the eggs one at a time.
Once the flour mixture is added you add lemon juice and zest!
 Then comes the blueberries which you gently fold in.
Be sure to butter and flour the pan.  I did go back and add more butter and flour so that the pan was completely covered.
Here's the finished product!  Yumm
 I really recommend using that recipe if you like lemons or blueberries, it was delicious and moist!

Once the desserts were set up I went to work creating a beautiful floral arrangement for the tables.
Using two stripes of different patriotic fabrics and some red ribbon I tied them around mason jars and added flowers from around the house.  What do you think?


Anyone else have any good summer recipes?  What about 4th of July decorations?  The more I look on places like Pinterest and other blogs the more excited I get about having my own place to throw parties and decorate!

Thanks for stopping by and enjoy your holiday!

Brittany

Saturday, June 18, 2011

DIY Dry Erase Board!

Thanks to Pinterest (you can read my rave blog about that here) I found a great idea for a DIY Dry Erase Board!  Here's a picture of the one I found!  You can see it on pinterest by clicking on it!
It's just a piece of scrapbook paper behind glass that you can write on!  So simple, so cheap and such a great idea!  

So I set out to create my own! 

I decided to use fabric instead of paper since my mom has some great patterns.  Here's the 3 I decided to choose from.  I ended up with the one on the right.

 Next my project ADD took over and I realized that I could put fabric in a small frame gallery I have on my wall.  So here's the fabric I choose for that!
 I've really been into natural colors lately, hence the green and yellow and since my room has no specific color theme they work!

After my mini project I returned to my frame.  I first ironed the fabric (which didn't work out all that well but I'm not a perfectionist and might actually replace it with paper later anyway).  Then I taped it to the mat in the frame.
 Once that was on I taped a piece of thick paper onto the back of the fabric to make sure the brown backing didn't show through.
 Here are my two projects side by side!  Cute huh?  Everything looks better behind glass!
 I think I would have preferred a tealish color to match my bedspread for the small frame, but this works for now.
 I went with a yellow for the dry erase board since it'll be easy to read with any color.  I was leaning towards a teal or purple color (to match my purple pillows and organizer boxes) but thought it might be hard to read green or red on those colors.
 Here's the board on the wall.  Notice I did something with my scarves?  I'll get to that later!
I think it looks much better than the board I had before.  You can see that in the before / after pictures!  It was a simple project that took no time and really changed the look of that wall.  I'll get into more detail about that wall later since there are other things I changed!  Can you see what else is different?  What are some projects you've done that have taken little time but made a big difference?  I'd love to hear about them!

Have a great weekend and thanks for stopping by!

Brittany

Thursday, June 9, 2011

Necklace Solution - For now...

Another Jewelry category which I love / hate are necklaces.  Oh how they drain my bank account yet can glam up so many basic outfits (I admit I'm a fan of all things jeans plus T-shirts).  Yet, when it comes to organizing and storing them one can only have so many necklace hangers or in my case, tacks in a wall...


Oh yes, holes a plenty.  So I decided to use something I already had on hand to display my necklaces in a functional and attractive way, similar to how I organized my earrings.  I grabbed the old bulletin board from my room to see how I could use it!  After 2 coats of white paint on the frame and some hot glue to hold the board which was falling off onto the frame it was looking pretty good.  Then all I did was add the tacks that had previously been on my wall to the board and hang it on the wall.  Then I hung my necklaces in a somewhat organized fashion from longest to shortest then my really long ones on the side.  I went from having 20 holes to 2 in the wall which made my pretty happy!
I still want to do something about my stud ribbon since it doesn't really go with anything in the room or help out the necklace board in any way.  There are also so many earrings on it that I haven't worn since I bought them in middle school from Claire's.  I suppose jewelry is one of those things you hate to get rid of in case you happen to have an occasion to wear those horrible bumble bee studs your aunt gave you 10 years ago.  So, that is certainly on my to-do list; get rid of unused earrings.  Does anyone have any good ideas for storing them or how you get rid of the ones you don't want?  What about your to do lists? Anything that is only halfway there?

Thanks for stopping by!

Brittany

Saturday, June 4, 2011

Air Vent Covers and Radiator Grates

Jewelry is something that has always been a pain to organize.  If you take it on a trip it gets tangled up, if you put it in a box you have to dig through it, if you can't find a pair you have to wear the same ones all the time, if you give a mouse a cookie... you see what I mean?

So I thought it was time for me to figure out some way to organize my dangly earrings in a way that was easy to make and attractive.  While I was abroad I spent much time perusing other blogs for inspiration  and found this lovely idea HERE.  I knew that I wanted to make something like that for my earrings because of how easy and aesthetically pleasing it is (Hey! That rhymes!).

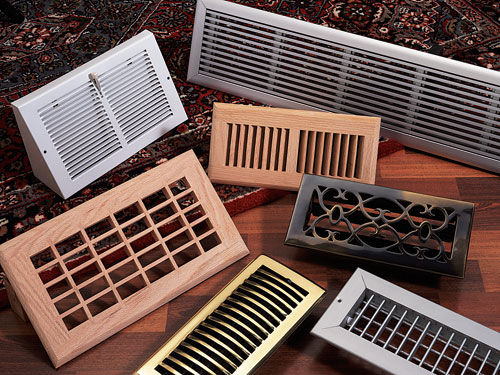
So in my first week home I went shopping for radiator grates which I described to the guys at Home Depot as air vent covers.  This lead me to the (surprise)... air vent covers and I looked at them trying to think if that is how it was made on the website because it didn't look possible with even decorative air vent covers.

That is how I got into an intense conversation about how "I'm not an artist per se but more of a DIY kind of gal" with the Home Depot employees.  Eventually we all agreed the vents would not work and I went off to look for what else it could be.

I was strolling down the aisles trying not to get distracted and then spotted (by accident of course) some large sheets of metal with designs on them which were perfect for my project!  I quickly grabbed one and ran back to the guys who had been helping us figure out the best way to hang earrings off an air vent to see if they cut metal in the store or if I had to buy the whole sheet and cut it at home.  They directed me to the wood cutting department and so I excitedly hopped over there with my 3 x 5 feet of radiator cover.

Once I reached the area I had to wait for the attendant to ask my rather bizarre question.  So as he arrived I kindly asked him if they cut metal by chance or if I'll have to buy the whole sheet.  At this point he gave me what could have been his life story before ending with "We sell things you can buy to cut the metal but I'm not going to do it for you".  So after spending far longer than expected at Home Depot I paid for my huge sheet of metal and went home.  (If you happen to get an earring holder for a gift it's because I have so much of the stuff left over)

I had already purchased a frame from Walmart that was 11 x 13 with a white mat that made the frame 8 x 10.  I then wrote on the metal with a sharpie where I needed to cut.  Once that was done I asked my dad if he could cut it for me.  Then all that was left to do was tape it to the mat and hang it on the wall!
 As you can see I have too many earrings.  Perhaps this project will inspire me to purge some of the ones that I don't wear...
 But I could wear them all... one day.
Isn't this adorable, and so useful!  It's wonderful to have all my options right where I can see them.  I do wear earrings more often now that I can see what I have!  This project was a bit on the expensive side but only because I had to purchase the whole sheet of metal.  However, now I have a great gift idea that would only cost me the price of the frame!  Here's a budget breakdown for you if you're interested in doing a similar project!

Budget Breakdown
Metal Sheet - $25 
Frame - $12

Total: $37

Have a great weekend everyone and thanks for reading!
Brittany